
What is Included in a Monthly Club
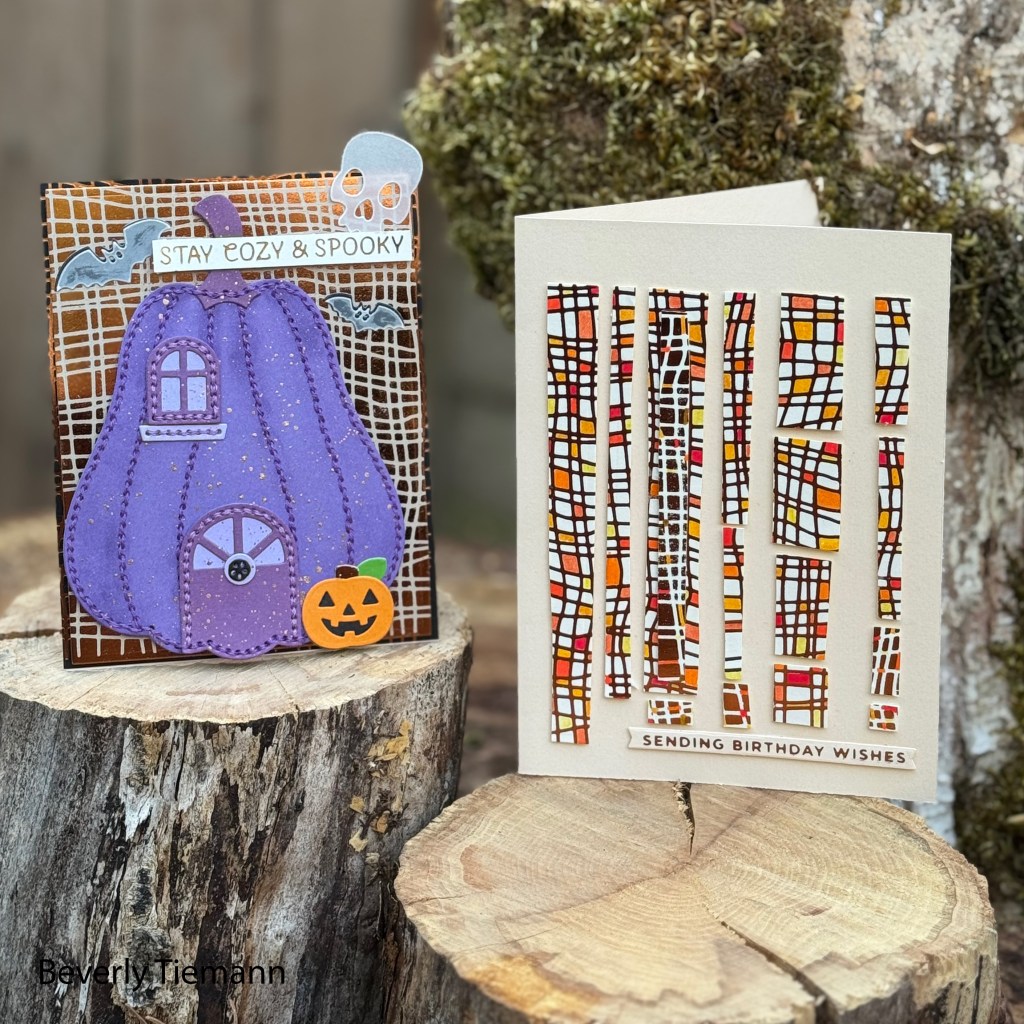
Spellbinders monthly clubs run the gamut from dies to wax seals to stencils and more! Today, I am going to share some projects made with their September Glimmer Hot Foil Kit and Embossing Folder (2D) Kit of the month. They also have a 3D embossing folder membership. The difference between the two types of embossing folders is that, aside from different designs, the 3D makes a more pronounced – deeper impression. As you can see on the cards above and below, the regular embossing folder still gives a beautiful impression on both regular and mirrored cardstock. The Glimmer kit comes with an exclusive hot foil plate set and a roll of foil. This month’s Glimmer plate is called “Gilded Weave”. Along with the A2 card sized plate, it come with two sentiments. It is a $40 value and costs $25 for the monthly membership. The Embossing folder kit (2D) is $12.50 and comes with a 5.5″ x 8.5″ folder which can be used for A2, slimline and 5″ x 7″ cards. Autumn Breeze is this month’s folder.

Using Embossing Folders with a Gelli Plate
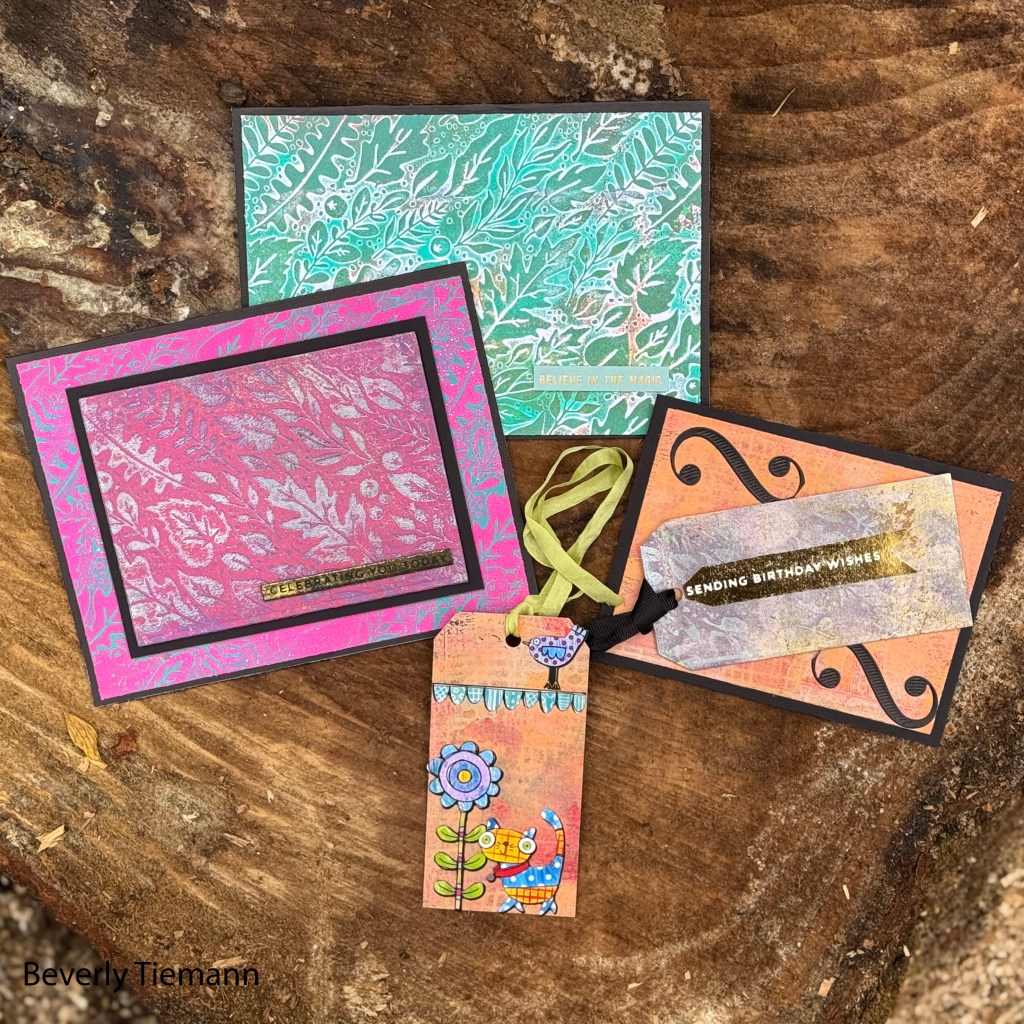
The embossing folder makes wonderful imprints on paper. This means in addition to gorgeous cards, the imprints can be used as a sort of stamp to make designs on a gelli plate for monoprinting. The cards and tag above show the end results of a playtime with the embossed images and leftover scraps from using the Glimmer plate, too. The embossing folder can be opened and placed directly on the gel plate. Because I like easy clean-up, I used the cardstock to make impressions instead.

Gilded Weave Glimmer Plate
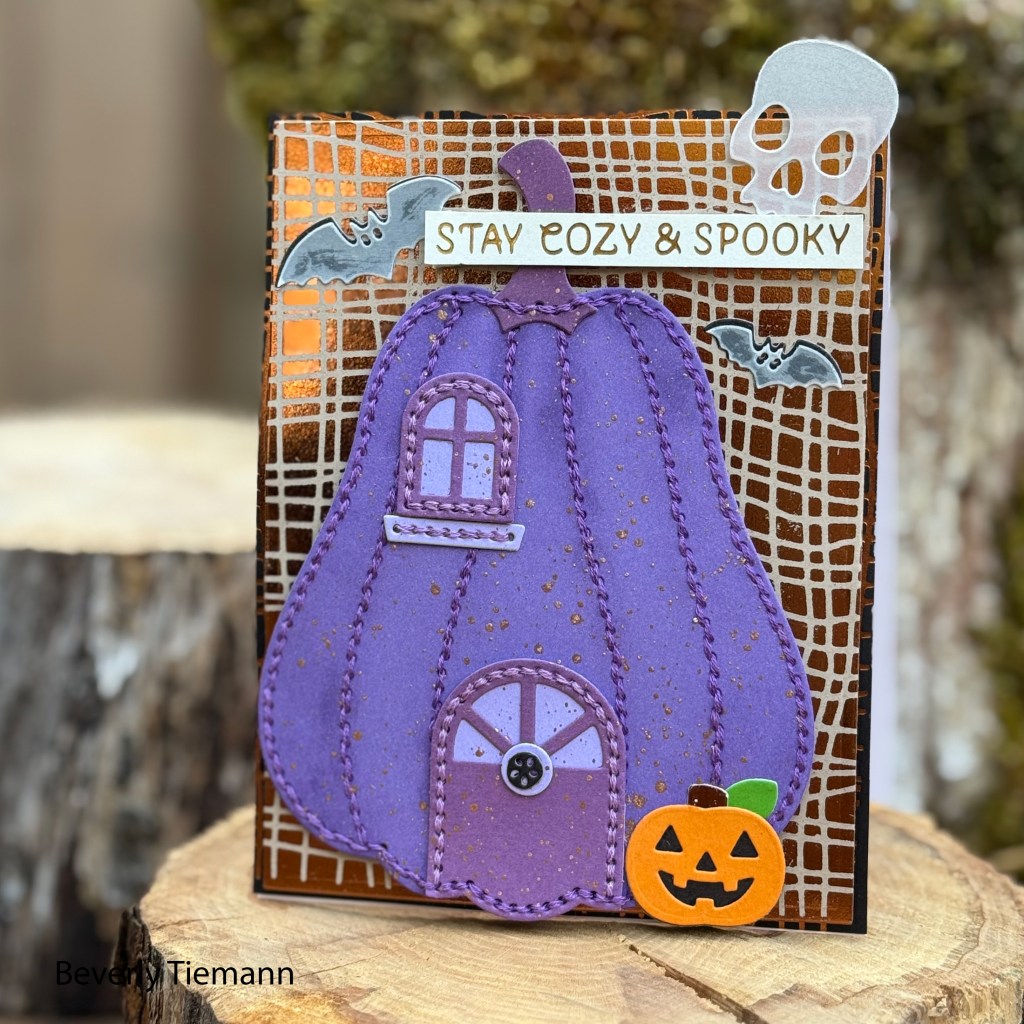
Hot foiling is done with a hot foil press system and a die cutting machine. It is an easy process with spectacular results. For further information on how to achieve the best results check out Spellbinders tutorials on their website. I used additional Glimmer sets and dies to make the following cards. The small sentiments came from the Mini Everyday Sentiments set. The large gourd is from a felt stitch set called Pumpkin Lane House. And the floral die cut designs on the embossed cards came from the Nov 22 Glimmer of the Month set. That plate and cutting die is currently on clearance on the Spellbinders site.
Coloring with Glimmer Plate Designs
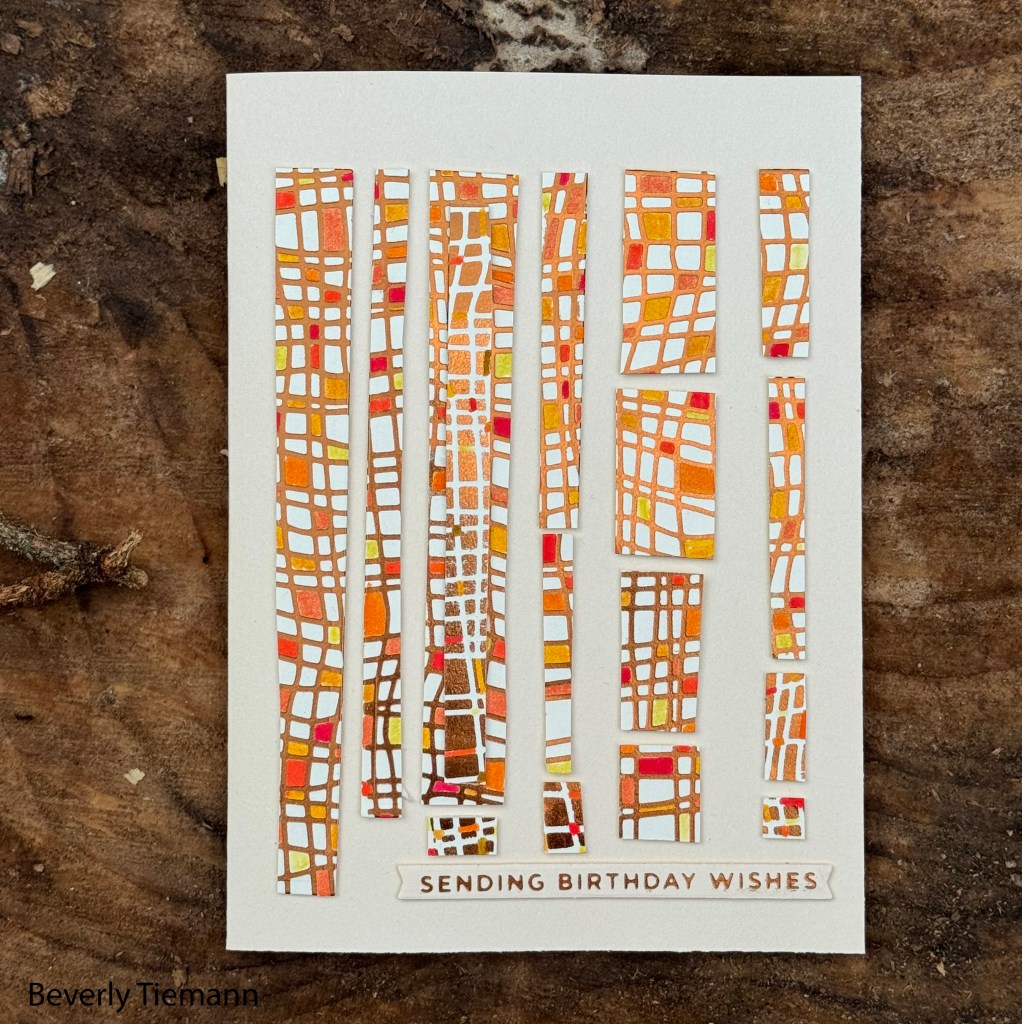
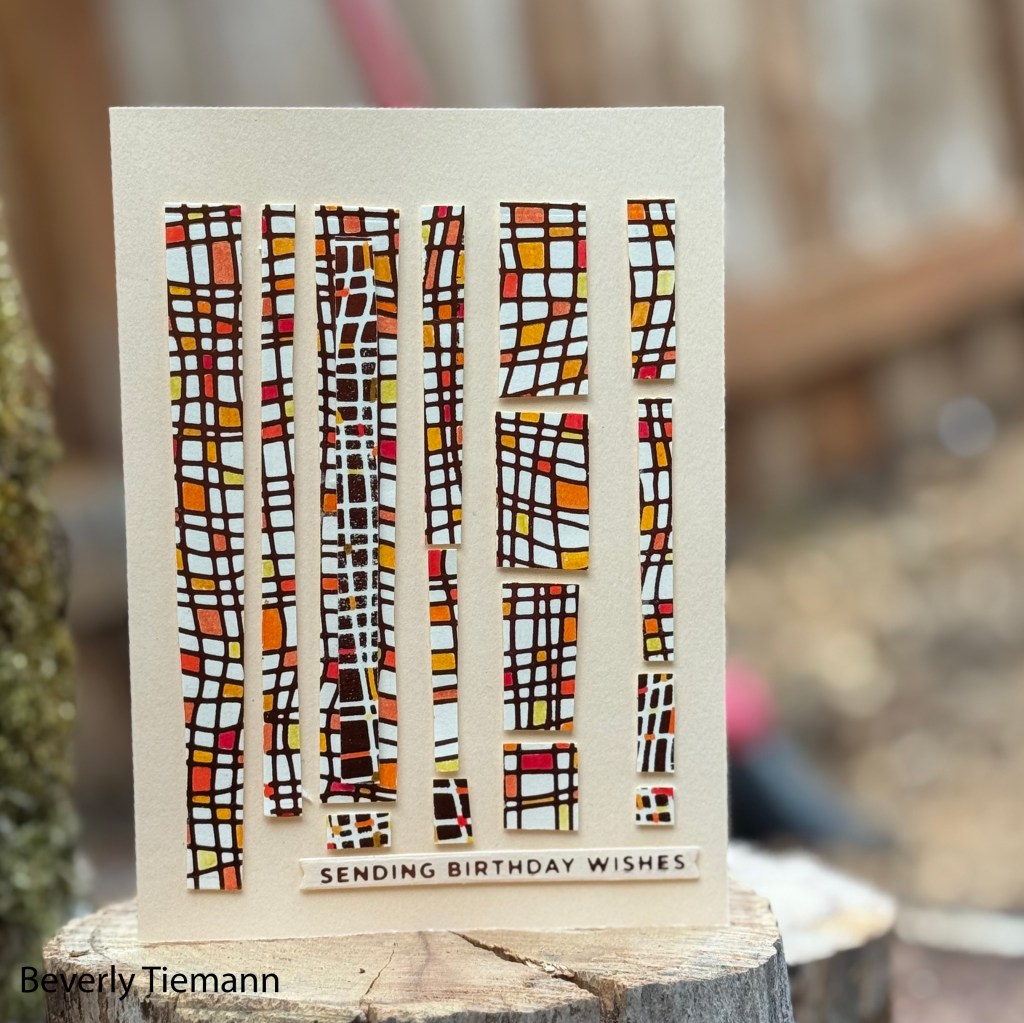
The design pictured above was colored with Tombow brush markers and then cut up to create a modern abstract art looking birthday card. Using dye based ink with the glimmer foil doesn’t cause any wearing of the glimmer. If you are unsure whether it will cause the foil to lift, test the media beforehand. When using acrylic paint on the gel plate for the mixed media cards, pictured above, the foil did transfer a bit.
Using the Positive and Negative Glimmer Designs
Save the discarded foil after making an impression and create an additional piece with the leftover foil. To do this, use a solid plate and repeat the process with another piece of cardstock. The picture above has a black cardstock base and a cream colored card front stacked on top. One is the positive and the other is the negative image. It is a great way to get two beautiful pieces with one piece of foil. Spellbinder’s solid rectangle plate is a little smaller at 3.12″ x 4.38″ than the one I used. The advantage to this plate is that you can create solid foiled rectangles for beautiful effects.
Full disclosure, I am an affiliate with Spellbinders and they provided the September 2025 Glimmer and Embossing Folder Kits to me. All of the other products used in conjunction with these kits were purchased by me. If you click on a link to Spellbinders or Scrapbook.com, I receive a small commission at no additional cost to you. This enables me to continue to provide tutorials and design ideas free of charge. Thank you.
Scrapbook.com links:


Scrapbook.com

Scrapbook.com


Scrapbook.com

Scrapbook.com

