

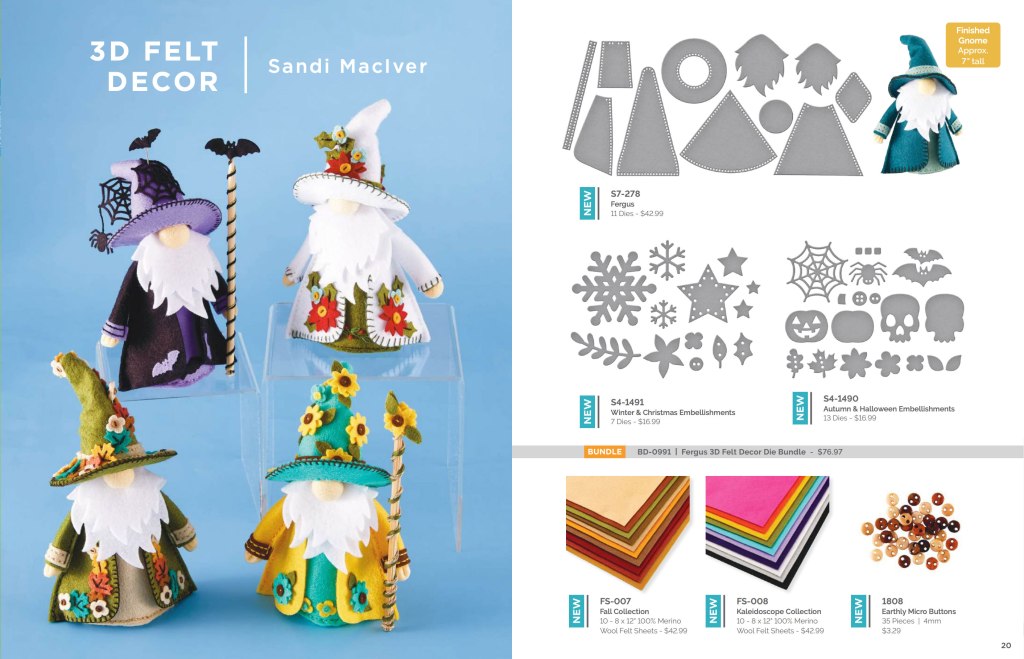
Fergus is Versatile
Wool felt, embroidery floss, stuffing, and walnut shells are the basis for creating Fergus. However, changing the color and the accessory dies will give him a totally different look. Below, will be examples and instructions for altering Fergus for even more versatility.

Follow the Directions For Felt Fergus
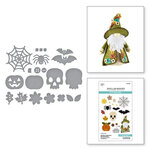
There are really thorough instructions about constructing Fergus on the Spellbinders product pages. Sandi, the designer, made several videos to explain the process step-by-step. Here is the link to the base Fergus with the videos. The same videos are available on the Autumn and Winter Embellishment pages. And if you’d like to go straight to the videos, they are linked here. This is not a quick project, but it is very doable when broken down following the directions that Sandi has provided. And Fergus is worth the effort because he is so cute!

Change the Materials If You Want
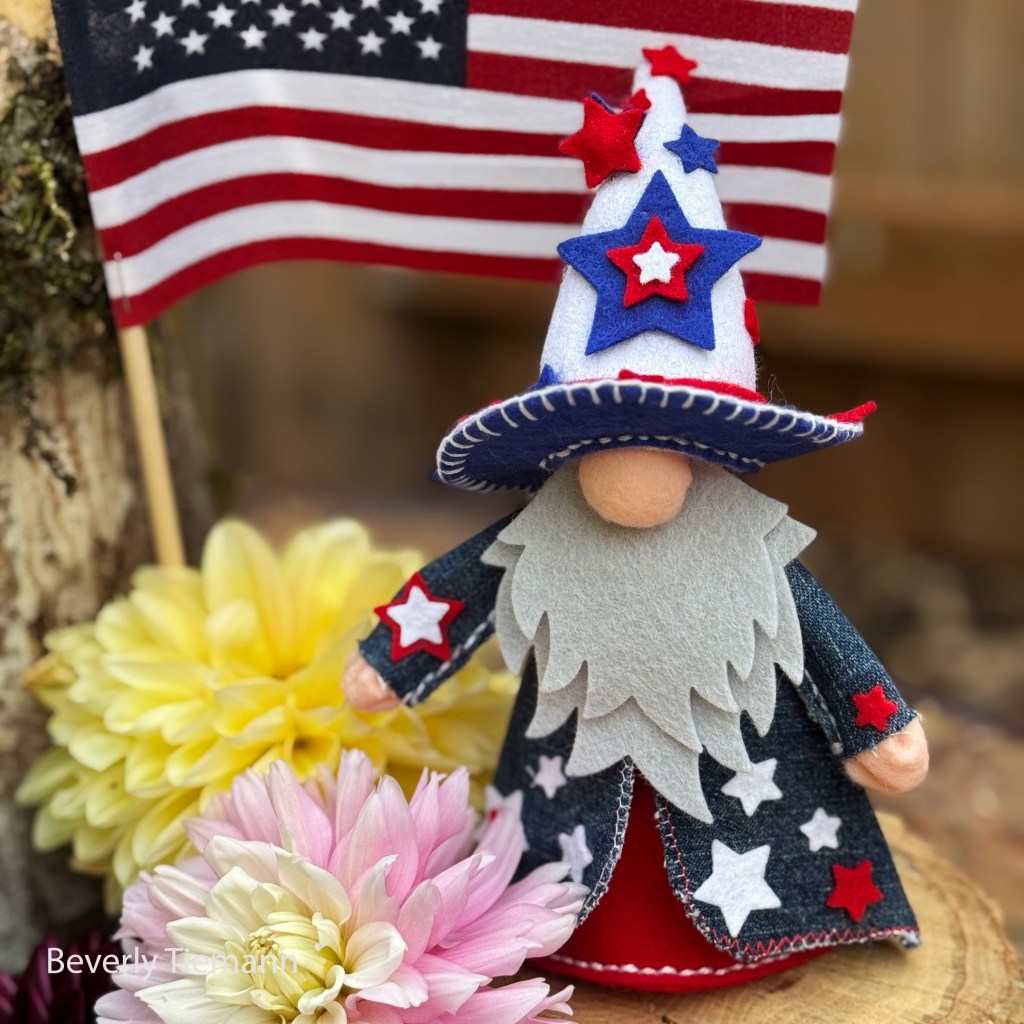
Most of my gnomes and accessories are made with Spellbinders Wool Felt. I used the Neutral collection for the nose and hands, giving each Fergus a different skin tone. The Warm collection was used for the Fall Fergus coat and many of the flowers. Many of the leaves, additional flowers, snowflakes, and stars were made with the Cool and Holiday collections. The following photos show Fergus with a mixture of Spellbinders wool felt and fabric from my stash. I used a variery of repurposed denim, wool, linen, craft felt, and quilting cotton. Much of the handstitching was done with Perle cotton in size 8 and 12. I found that the 12 worked a bit better due to concerns about tearing the felt.
Thickness and Weave of Fabric
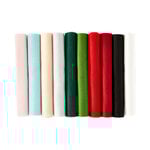
The Spellbinders wool felt comes in a package of 10 colors. Each sheet is 8″ x 12″ and is 1 mm thick. This works perfectly with the dies. If your plates are warped or scratched, you may need to add a piece of paper as a shim. Because I had a beautiful piece of repurposed wool (which was intended for rug hooking) that seemed perfect for a coat for a Scottish Fergus, I ran it through the die-cutting machine with a lot of hope it would work well. It did not. Some wool fabrics are thicker than wool felt. But, I was determined to use it and it did work with the very small accessory dies as pictured below on MacFergus. I wanted to make his coat out of this plaid so I came up with an alternate plan. Which is how I discovered how to use very loosely woven fabrics, like linen.
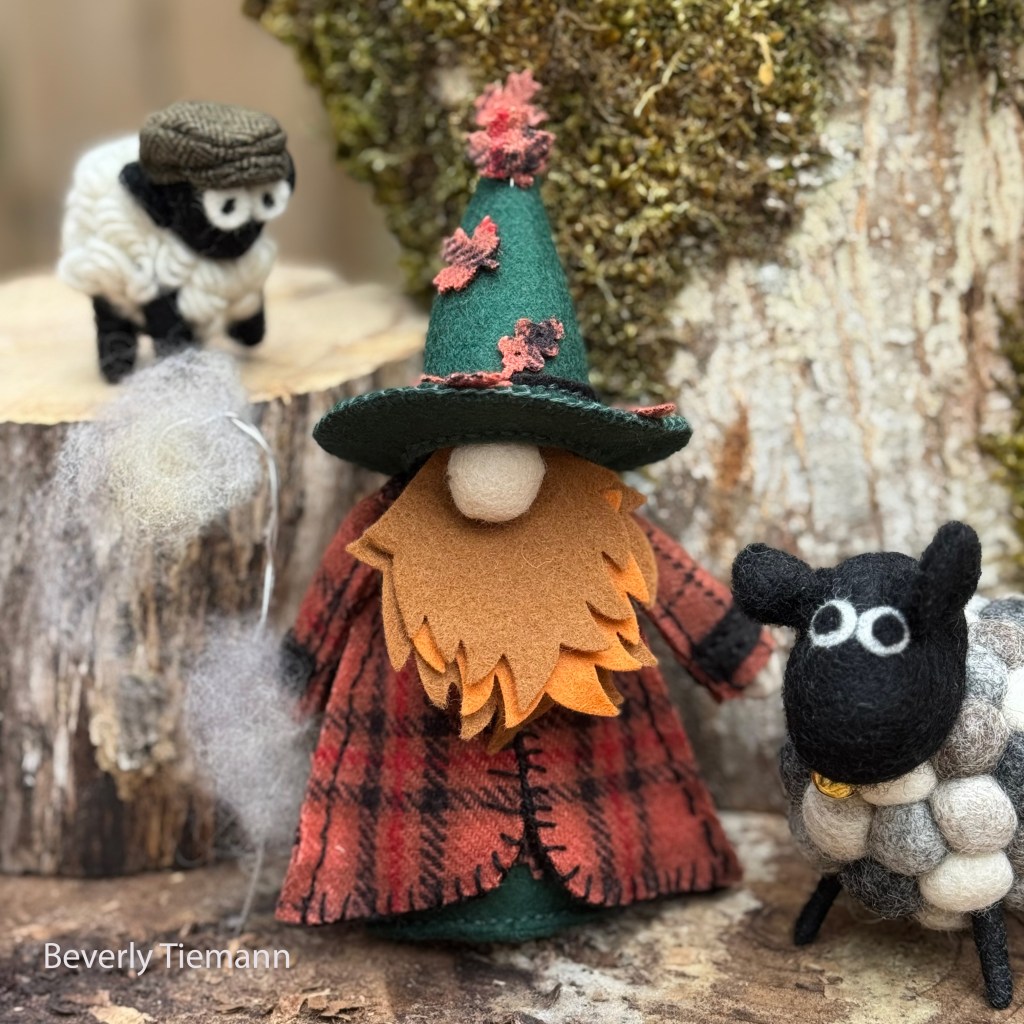
Trace Instead of Die Cut
I flipped the dies over and cut around the plaid wool. This was not the easiest, nor best way to use the dies. But it worked for what I wanted to do. When using the dies as templates, you lose the sewing holes. This gives you some added flexibility because you can use a sewing machine to sew the pieces. There are trade offs with this idea. Namely, the sewing holes are great guides for assembly. Also, the dimensions of the pieces are altered because the cutting lines are smaller than the exterior of the dies. It works, but this is not how the product was intended so you’ll need to make some modifications when cutting and assembling. The wool felt is the same on either side. If you use a one-sided fabric or one that has been stabilized with interfacing you’ll need to be mindful when tracing and cutting. Primarily, one coat panel will be used right side up and the other right side down to make both front pieces. I attached an iron-on stabilzer to all of the cotton, linen, and denim pieces shown in the pictures of FergUS and Flower Child Fergie.

Stabilized Fabric With Die-Cutting Machine
The denim has some stretch to it and it seemed better to stabilize it. Once they were stabilized, some of the fabrics were perfect to run through the die-cutting machine. For example, Flower Child Fergie’s hat and all of the flowers cut beautifully. But for ones that I wanted to sew with a machine, I used the dies as templates and traced with a pencil for cutting lines. There are so many possibilities when it comes to how to make Fergus the Gnome your own creation. He is so cute as intended and doesn’t need to have any additional modifications, unless you want to go that route.
Staves/Scepters Accessories
I used wooden skewers to make Frozen Fergus and Flower Child Fergie an extra prop accessory each; a staff or scepter. The sparkley one was made by slathering glitter glue and Nuvo Silver Gilding Flakes all over it. Then I topped it with a wool felt snowflake cut from the Winter Embellishment die-cut set. All of the snowflakes used with Frozen Fergus have Star Dust Stickles rubbed on them. The colorful staff for Flower Child Fergie was made by wrapping variegated perle cotton around the skewer with glue to adhere it in place. Then attaching cut flowers from felt and stabilized fabric. The dies for these flowers are from the Autumn Embellishment set.
Full disclosure, I am an affiliate with Spellbinders and they provided the Fergus and accessory dies to me. All of the other products used in conjunction with these kits were purchased by me. If you click on a link to Spellbinders or Scrapbook.com, I receive a small commission at no additional cost to you. This enables me to continue to provide tutorials and design ideas free of charge. Thank you.
Scrapbook.com links:


Scrapbook.com

Scrapbook.com


Nuvo – Gilding Flakes – Silver Bullion
Scrapbook.com
Ranger Ink – Stickles Glitter Glue – Stardust
Scrapbook.com

